Geo-SAM Segmentation (QGIS plugin)#
Click the Geo-SAM Segmentation icon to open the interactive segmentation widget. You will be shown a demo raster image with thaw slump and small pond landforms for you to try the tool. With a single click on the map, a segmentation result will be generated.
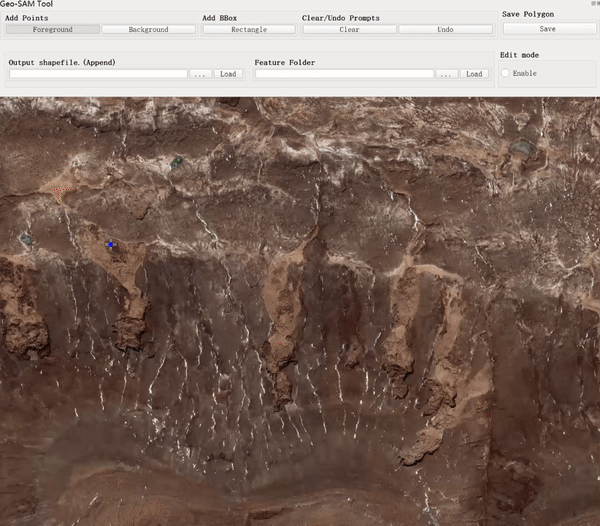
A user interface will be shown below.

There are 4 Tabs in the interface:
Prompts: to add prompts (Foreground Point, Background Point, Bounding Box) and save the segmentation results
I/O Paths: to load image features and specify the output layer or file
Styles: to change the styles (colors/sizes) of the prompts and segmentation results
Options: other options just like
preview mode,maximum polygon mode,default minimum pixels, etc.
I/O Paths Tab#
Load Image Features#
The plugin is initialized with features for demo purposes, and you can set the Input Feature Folder in the I/O Paths Tab to select the folder that includes the image features you need.

Then, press the Load button to load the selected image features. Remember to add the corresponding raster image to the QGIS project.
SAM Output Layer or File#
This is a shapefile file or layer used to save the segmentation results from SAM. You can specify it from:
the current layers in QGIS project (only support previous saved shapefile using this plugin)
a file (will be created if not exist).
Note
If the output directory is not specified, a temporal file in memory will be created to store the segmentation results. Do remember to save this results to a file before closing the QGIS.
Prompts Tab#
Add Prompts#
There are 3 types of prompts:
FG (Foreground Point): a point that indicates the foreground of the object (desired area)BG (Background Point): a point that indicates the background of the object (undesired area)BBox (Bounding Box): a bounding box that limits the boundary of the object
Note
You can add multiple prompts for each type and combine them to segment one object.
You can use the
Tabbutton to loop between the 3 prompt types. The cursor will also change to the corresponding types.
Undo/Clear Prompts#
Press
Undobutton (Shortcut:Z) to undo the last prompt.Press
Clearbutton (Shortcut:C) to clear all prompts and unsaved segmentation results.
Minimum Pixels#
The minimum pixels for the segmentation result. The object with fewer pixels than the Minimum Pixels value will be removed from the segmentation results. The Minimum Pixels will change to Default Minimum Pixels after saved the segmentation results.
Save Current Results#
You can save the segmentation results by clicking the Save button (Shortcut: S), after adding points and a BBox prompts for segmenting a object.
Once saved, the segmentation results will be added to the output layer or file specified in the I/O Paths tab. These results cannot be undone using the plugin’s Undo button or the Z key. However, you can use QGIS’s built-in undo function (Ctrl+Z or Command+Z) to revert the last saved changes. Additionally, you can use QGIS’s built-in editing tools to further modify or delete the saved results.
Note
If the S key isn’t working, first check if the Snapping Toolbar is enabled. The S key will not function with this toolbar active due to a shared key binding. If disabling the Snapping Toolbar doesn’t resolve the issue, try deactivating other plugins that might also be using the S key. See coolzhao/Geo-SAM#42 for more information.
Enable/Disable the Tool#
You can uncheck the Enable button to temporally disable the tool and navigate on the map.
Styles Tab#
Colors#
Due to the diverse range of colors in remote sensing images, the default color scheme may closely resemble the image colors, making it difficult to differentiate. Therefore, we have added an option to modify colors in the Styles Tab.
There are 3 types of colors for the Prompts:
FG Color: the color of the foreground pointBG Color: the color of the background pointBBox Color: the color of the bounding box
There are 3 types of colors for the segmentation results:
Polygon Color: the color of the segmentation results from pressed promptsPreview Color: the color of the segmentation results in the preview mode (results that with mouse moving)Boundary Color: the color of the Boundary of the image feature.
For the color of SAM output, you can change it by directly changing color of this layer in QGIS.
Point Size#
The size of the point prompts (Foreground/Background Point).
Options Tab#
Preview mode#
To facilitate better labeling, we have developed a preview mode. In this mode, SAM’s execution results are displayed in real-time as you move the mouse, allowing to observe the prompt’s effect instantly. In this mode, users can choose the most suitable prompt without worrying about getting worse by adding new prompt, reducing the frequency of prompt modifications.
Important
The
Preview modeis designed only for previewing purposes, and only thepressed promptswill be saved.You can use the
Pkey to toggle thePreview modeon/off.

Max Polygon Only#
Enable/disable the maximum polygon mode. When enabled, only the polygon with the maximum area will be saved. This is useful when there are typically multiple polygons generated by the prompts and you only want to save the largest one.
Default Minimum Pixels#
The default minimum pixels for the segmentation result. The object with fewer pixels than the default value will be removed from the segmentation results. The Minimum Pixels will change to Default Minimum Pixels after saved the segmentation results.
Load Demo#
enable/disable loading demos when open widget.
Show Boundary#
enable/disable showing the boundary of the image feature in the canvas.
Reset To Default#
Reset all the settings (Styles and Options) to the default values.
Shortcuts#
Tab: loop between 3 prompt types (the cursor will also change to the corresponding types)P: Toggle to enable/disable executing SAM withPreview modeC: clear all prompts in canvas [same asClearbutton]Z: undo the last prompt in canvas [same asUndobutton]S: save SAM output features into polygon [same asSavebutton]Ctrl+Zorcommand+Z: undo the last saved segmentation results
Tips for Using the Segmentation Tool#
Deal with only One object each time
Use Background Points to exclude unwanted parts
Use Bounding Box (BBox) to limit the segment polygon boundary
The BBox should cover the entire object
Remember to press the
Savebutton after the segmentation of the chosen object